With almost 2 years between posts many things have changed in the garden!
The veggie garden is compete, and producing and providing for our family of five.
A few major things have happened since I last posted. My area of Australia has been through the worst drought in recorded history and the world is currently navigating the pandemic of Covid-19. There are positives to both of these things if you look closely.
The drought brought brutal dust storms and heat, growing veggies was a very tough gig but I now have renewed resilience and great perspective of perseverance. We made it out the other side, we will certainly survive another round!
Since we have been locked in our homes and the country has closed down and so many people have turned to their backyards for santucary and sanity. This has given me the opportunity to connect with people through the medium of gardening and their VEGGIES!
This has lead me to rebooting my webpage. I am now aiming to do seasonal updates and if anyone has questions about growing veggies in hot, dry climates such as the Northwest plains of NSW I will do my best to help! So reach out and connect, get in touch and lets get in the garden together.
I will post the winter update in early June.
Stay tuned,
Happy gardening
Bed all finished and in production! Tomatoes had just been removed and the beds were getting ready for a quick cover crop before the cooler weather. Corn is going well and pumpkins going crazy in the newest bed down the back.
“Spring is nature’s way of saying ‘Lets PARTY!'” – Robin Williams –
SPRING! It is my favourite time of the year and although in my area of northern NSW it may only feel like it lasts about 2weeks, I really do treasure it. Warmer, longer days, flowers coming out everywhere and a great new chance to plant next seasons veggies – what’s not to love.
Things are certainly happening in the veggie patch at the moment but it has not all been flowers and rainbows. I have been planting furiously but unfortunately there has been a horrible, hot, gale force wind that has been blowing for the last 3 weeks. The wind has burnt off almost all my pumpkin, squash, tomato and bean seedlings as they were coming out of the ground. The corn and a few older seedlings I bought have survived, just.. and surprisingly the last of the winter veg hung on better than I thought. I was sure that they were all going to bolt to seed but I still have my fingers crossed for a late crop of broccoli and cauliflower.
This photo shows just how exposed the patch is to wind.
If nothing else this wind has really proved to me that I must get my wind break going. The wind has been the biggest issue at the moment and I aim to have a decent and functional wind break in so next summer my first round of seedlings don’t suffer a similar fate during the August/ September winds!
I have tossed around many ideas of what plants I should use as my wind break and I have decided that I will grow a predominantly native hedge that will run down the Northern and Eastern boundaries of the veggie patch. I have chosen a few flowering gum tress, a number of different grevilleas and some fast growing wattles. As these are all evergreen they will provide year round shelter and also the added bonus as they will attract birds and bees to my garden and really add to the diversity of the space.
This little polly tunnel was made and designed with the idea that I could get the jump on my summer vegetables and protect them from any late frosts and it worked a treat. I planted tomatoes under it and they all came up and were looking good, frost risk was over so I removed it… wrong thing to do… What I should of done is leave it there longer to protect my seedlings for the relentless winds as all but 2 of them were wiped out. Next year I will do it again but leave it there until the tomatoes are much bigger, this way they might withstand the 33ºC / 60km winds?
I built this polly tunnel to protect against late frosts
So the current situation is that I am about 3weeks behind in where I thought my veggies would be; however, many lessons learnt and fingers crossed the wind has given up a little and the rain comes down.
(oh and I couldn’t help myself… I did get some new materials to start the 3rd and final stage of the veggie garden… Will update next month)
As it’s the middle of winter I feel like this is the best time to do the big jobs, and of course the aim is to have them done and ready for growth in spring. The focus of the last month was to finish the garden beds in my first phase before moving to the next… but it would seem that I don’t stick to plans very well!
I came to a bit of a stand still with my manure supply and that was one of the layers that I really didn’t want to cut corners on. So while I waited for the animals to get to work I went looking for more materials to use in the next phase.
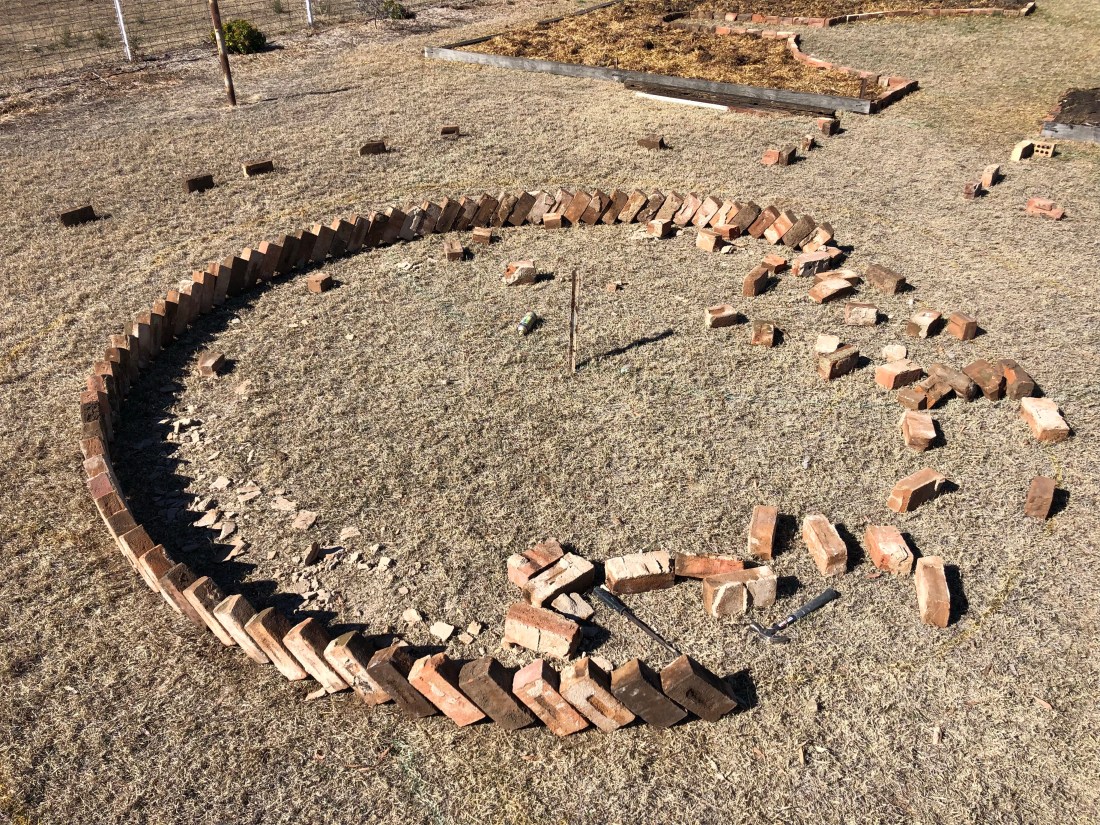
It was then that I came across a huge pile of bricks that I worked into my (ever changing) design and now I will get onto finishing off all the beds…
Almost there… need a few more loads of manure, dirt and straw but getting very close.Walkway down the middle of the bed to minimise compaction.Circle garden bed in the middle of the 2nd phase to compliment the circle in the 1st phase.
After much thought I was happy with the circle in the middle and I was thinking of having 4 smaller beds on each side so that I could plant and pick from each side of the beds and avoid walking in them. Instead I opted to go for 1 large bed on each side and made a walkway down the middle with left over broken bricks. By doing this it meant bigger, more uniformed beds but it also made the design more simplistic and I can get the mower in between all the beds.
Now what will the design be for my third phase???? Any suggestions?
Being the middle of winter plants aren’t going crazy at the moment but things are still progressing. Still planting winter seeds in the beds and seedlings are slowing getting going. I am still waiting on a few new summer seeds to arrive and once they are here I will get them planted into trays and started, ready to plant out when the threat of frosts have passed.
Feeling positive that my next post won’t bring any updates on design or new beds but hopefully more photos of growing plants that are well on the way to bringing the garden to life!
– Gardens are not made by singing “Oh, how beautiful,’ and sitting in the shade. – Rudyard Kipling
First seedling planted!
Step by step, wheelbarrow by wheelbarrow, plant by plant I feel like I am moving my way to a successful vegetable garden. Stage 1 is well underway, it’s a little slower than expected but I fell like it is about 50% there.
The first thing I did since my last post was change the design for the garden beds in stage one… Standing out in the bare, vacant area with my design and measurements in hand I decided to incorporate a few more curves to soften the area a little. It can be a pretty harsh part of the world at times so I didn’t feel I needed to have all straight and ridged lines. Just outside the garden fence is large sweeping treeless plains of farming where heatwaves dance across in the summer and strong winds can blow in the winter so I thought a few soft lines in the garden maybe just what the landscape needs.
I have made a circle in the middle and constructed my four beds around this. Bed three and four are joined at the top which I thought made the pathway between one and two feel a little unfinished. This sent me on a walkabout to the old sheep yards to source some material to reuse as an archway. I feel like this joins the two spaces together better.
Archway joining bed #1 (on the right) and bed #2
All the material I have used for the bed construction are all reused and recycled. The edges are made from old cattle yard rails and bricks which I have found around the farm. All the pegs holding the rails in place are cut up old iron posts and even the wire that holds things together have been pulled out of the rubbish pile and given another life. The only thing that I have bought for the whole project to date is the seedlings and one bale of lucerne hay for each bed. So it all coming to a grand total of about $50 so far!
Bed one is now all finished and planted with broccoli, cauliflower, beetroots and spring onions. Bed two is nearly there, just waiting on the layer of compost and then the plants can go in. Bed #3 and #4 only have straw on the ground. I have mostly stuck to the no dig garden plan that I outlined in the June addition although bed two is slightly different. It wasn’t my intention but I couldn’t for the life of me get the push mower started to gather the lawn clipping for the first layer and with no mechanic appearing from the bushes I just skipped this step and put a slightly thicker layer of manure on.
Stage 1 coming together. Bed numbered 1-4 clockwise from the bottom left.
I am really happy how things have been coming along. As with all gardeners, I do have a few concerns about the weeds. Couch grass is going to be the biggest problem I can see at the moment. Its 100% of the original ground covering of the old tennis court and as I collect the manure from the paddock it is impossible not to bring in more runners. It will be a constant battle keeping it out of the beds but hopefully the layering of newspaper and cardboard underneath each bed, constantly looking for signs of it poking through the bed and maintaining the edges will be enough to stop it. After watering in the compost which has come form the cattle yards it has also brought up plenty of weeds. These will be easier to manage with weeding and as long at they don’t set seed it shouldn’t be an ongoing issue.
Overall very happy with it all at the moment. Still mountains to do and with spring fast approaching its time to start getting some seeds going and get the next two beds into the next phase.
Garden as though you will live FOREVER! – William Kent
This is the very start of my project! Currently it is an unwatered, unused and unloved area of the garden. I already have a veggie patch but it gets a bit too much winter shade and annuals are a little slow so I looked for a new spot.
The area I have chosen is an old tennis court so by nature it is a very hard surface of red sandy soil which will need a bit of TLC to get plants growing. With this in mind and limited handy man skills and resources I have decided to use no-dig garden beds. I have chooks, 1 horse and 1 poddy calf so I will use their manure and locally sourced hay to build the layers of my garden.
The ever evolving plan
As you can see I have big plans for this area and as it is approximately 34m x 14m I am not going to tackle it all at once. I have cut the plan into three parts and aim to have the 1st section done and planted over the next month.
Planning the beds of the new site!
Now I have the plans marked out for my new no-dig beds I will start with a layer of newspaper. Not only is this an easy blue print to follow and alter but it will help to suppress the grass as it is going to be tough to stop it from creeping into my beds.
Next is the layer of lawn clippings. I have to dust off the push mover to collect some lawn clippings and layer that onto of the newspaper. This green layer will bring much needed nitrate to the bed as it breaks down. This is followed by a layer of lucern hay which is a legume so also good source of nutrients.
Now its time for the animals to pay their rent! I have the luxury of a box trailer and over the next week or so I will be busy raking and shovelling up the brown gold and layering this with barley straw until I get a good height on my beds. In my area there is a lot of barley straw that I can source from farmers, it works well as the bales I want are the old weather damaged ones that no one else wants! The downside to using this product is that is does still tend to have viable seed, so just be prepared to do a little weeding; but that too can be used as mulch!
The last two layer are compost and then a final layer of straw. I will be using the dirt out of the cattle yards as my compost. It is aged dirt that has high organic matter and nutrients as a result of cattle being feed in the yards in years gone by.
Now… actions speak louder than words so I am off to start the manual work and will be updating the blog at the end of the month!